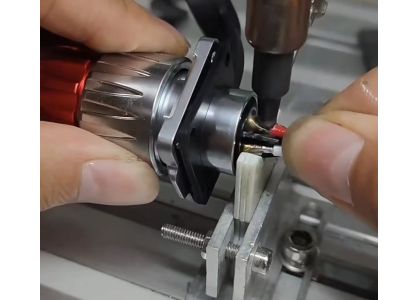

In the intricate world of electronics and electrical systems, the wire harness plays a crucial role in ensuring the seamless flow of signals and power between various components. At the heart of this complex network lies the meticulous process of soldering wires to connectors, a technique that binds the conductive pathways with precision and reliability. This article provides a comprehensive exploration of the wire and terminal soldering steps involved in crafting a robust wire harness.
Materials and Tools
Before delving into the intricacies of wire and terminal soldering, it's essential to assemble the necessary materials and tools for a smooth workflow:
Soldering Iron: The cornerstone of the process, a soldering iron of appropriate wattage ensures controlled and effective soldering.
Solder: Opt for a rosin-core solder specifically designed for electronics work, offering a reliable and conductive bond.
Wire Strippers: These tools facilitate the precise removal of insulation from wire ends, preparing them for soldering.
Heat Shrink Tubing (optional): Serving a dual purpose of insulation and Strain Relief, heat shrink tubing enhances the longevity and durability of the soldered connections.
Connector: Compatibility with both wires and the application is paramount when selecting the connector, emphasizing the importance of a well-informed choice.
Flux (optional): While optional, flux aids in optimizing the flow of solder, contributing to the quality of the solder joints.
Procedure
Prepare the Wires:
Utilize wire strippers to delicately remove a section of insulation from the wire ends, exposing the conductive core.
Prevent fraying by twisting the exposed wire strands, ensuring a clean and secure connection.
Prepare the Connector:
Prioritize understanding the connector's design, especially when dealing with multiple contacts. A clear map of which wire corresponds to each contact is vital.
Familiarize yourself with any securing mechanisms, such as screws, present in the connector.
Tinning:
Begin the soldering process by applying a small amount of solder to the soldering iron's tip, a practice known as tinning.
Briefly touch the tinned iron to the wire, allowing the solder to flow onto the wire strands. This preliminary step sets the stage for subsequent soldering.
Soldering:
Heat the connector's contact using the soldering iron, ensuring a uniform and controlled application of heat.
Place the tinned wire onto the heated contact, and with the soldering iron, apply additional heat while feeding solder onto the joint. This results in a seamless, well-covered connection.
Cooling:
Inspect the Joint:
Post-soldering, a visual inspection is imperative. A high-quality joint exhibits a shiny and smooth surface, devoid of cold joints or undesirable blobs. A concave shape, as opposed to a convex one, indicates a well-executed joint.
Repeat:
Insulate and Strain Relief (Optional):
Tips:
Adhere to the recommended soldering iron temperature for the specific application to ensure optimal results.
Work in a well-ventilated area to minimize exposure to solder fumes, prioritizing safety.
Patience is key; rushing through the soldering process may compromise the quality of joints.
Practice on scrap materials before embarking on the actual project to refine soldering skills and techniques.
As a final reminder, always prioritize safety by adhering to established guidelines and wearing appropriate protective gear when engaging in wire and terminal soldering for wire harness construction. This meticulous process ensures the creation of a reliable and efficient electrical infrastructure, underlining the importance of precision and attention to detail in the realm of electronic connectivity.
If you also require a Custom wire harness assembly service, please provide us with your customized wire harness drawing or diagram. As a professional manufacturer of custom wire harnesses since 2001, we possess extensive experience in producing any type of wire harnesses. All our products are manufactured according to IPC/WHMA-A-620 standards and meet the IATF16949 standard for automotive wire harnesses.


